
If you want to create labels without spending a lot on machines, you can use your home printer with sticker or cardstock paper to design and print custom labels easily. You can also use household items like painter’s tape, Post-it notes, or chalkboard stickers for quick, temporary labels. For more durable options, try applying printed designs with packing tape or using DIY systems like Xyron or Epson Labelers. Keep exploring for more simple, cost-effective labeling ideas.
Key Takeaways
- Use home printers with adhesive sticker sheets or printable cardstock for customizable labels without special equipment.
- Create labels with Cricut Joy and Smart Materials for quick, professional-looking vinyl or paper labels at home.
- Design and print labels using basic inkjet or laser printers on printable sheets for personalized, detailed labels.
- Repurpose household items like Post-it notes or chalkboard stickers for temporary, reusable labeling solutions.
- Apply printed designs onto packing tape or use adhesive systems like Xyron for durable, waterproof labels without costly machines.

Printable Sticker Paper for Inkjet Printer, 40 Sheets 8.5"x11'' Matte Sticker Printer Paper Full Sheet Labels for Laser/Inkjet Printers, Letter Size
🌟40 PIECES OF STICKER PAPER🌟 You will receive 40 sheets of white printable sticker paper that we have…
As an affiliate, we earn on qualifying purchases.
As an affiliate, we earn on qualifying purchases.
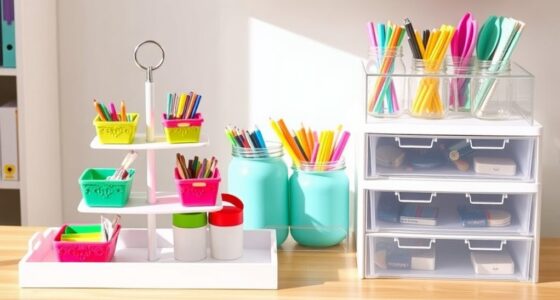
Using Your Home Printer With Sticker or Cardstock Paper

If you want an easy and affordable way to create custom labels at home, using your standard inkjet or laser printer with sticker or cardstock paper is a great option. You can design your labels on your computer using free or paid software, customizing fonts, colors, and images. Print your designs directly onto adhesive sticker sheets or printable cardstock, which are widely available online or in stores. Once printed, cut out your labels neatly with scissors or a paper trimmer for a professional look. This method requires no special equipment beyond your existing printer, making it cost-effective and accessible. It’s perfect for personal projects, organizing supplies, or creating decorative labels without investing in expensive machines. Natural pools can be designed with eco-friendly materials to complement your labels and outdoor space.

Liene PixCut S1 Color Sticker Printer & Cutting Machine – All-in-One Sticker Maker for DIY Crafts, Custom Labels & Gifts. Thermal Dye-Sublimation Photo Printer, 300 DPI, Precise AI Auto-Cutting
All-in-One Convenience – Print and Cut in One Step. Say goodbye to the hassle of using separate machines….
As an affiliate, we earn on qualifying purchases.
As an affiliate, we earn on qualifying purchases.
Creating Labels With a Cricut Joy Machine and Smart Materials

Using a Cricut Joy machine with Smart Materials simplifies label creation by eliminating the need for mats and complex setup. You just load the Smart Material directly into the machine, making the process quick and mess-free. Select your design using the Cricut Design Studio app on your smartphone, customizing fonts, sizes, and shapes effortlessly. The machine cuts vinyl or iron-on sheets into precise labels, perfect for organizing jars, folders, or storage bins. You can add detailed text or simple shapes, depending on your project. Since Smart Materials are pre-spooled and don’t require a cutting mat, you save time and space. This method offers a convenient, professional-looking way to produce customized labels at home without investing in larger, more expensive machines. European cloud innovation emphasizes energy-efficient solutions that can also be integrated into DIY projects like label making.

Cricut Joy Machine & Digital Content Library Bundle
CRICUT JOY and DIGITAL CONTENT BUNDLE- This Cricut Machine bundle comes with a digital library of 30 images….
As an affiliate, we earn on qualifying purchases.
As an affiliate, we earn on qualifying purchases.
Producing Custom Labels With Cricut Maker and Explore Series

With the Cricut Maker and Explore series, you can easily create custom labels using Cricut Design Space software. Their print and cut features guarantee precise shapes and images, giving your labels a professional look. Plus, you can choose from a variety of materials to match your project’s style and durability needs. Softball community can benefit from these customizable labels for team organization, gear identification, and personalized decorations.
Design With Cricut Software
Designing custom labels with Cricut software is straightforward and offers a high level of creative control. You can easily create unique designs tailored to your needs by customizing fonts, images, and shapes. To enhance your projects, consider these key features:
- Design Space Interface: User-friendly layout with drag-and-drop tools makes editing simple and intuitive.
- Layering and Grouping: Combine multiple elements, adjust transparency, and organize your design for complex effects.
- Image Uploads and Text Editing: Import your own images or choose from a vast library, then personalize with various fonts and sizes.
With these tools, you can craft detailed, professional-looking labels without advanced design skills. The software’s flexibility allows you to experiment freely, ensuring your labels are exactly how you envision them.
Print and Cut Precision
The Cricut Maker and Explore series excel at producing precise, professional-quality labels through their Print Then Cut feature. This process combines high-resolution printing with exact cutting, guaranteeing your labels have clean edges and detailed shapes. You start by designing your label in Cricut Design Space, including images, text, and borders. When you send it to print, the machine prints your design with inkjet quality on compatible paper or printable material. Once printed, the machine seamlessly aligns the cutting blade to match the design, trimming around the shape with millimeter accuracy. This precision allows for intricate designs and consistent results, even with complex shapes. Whether creating small labels or larger, detailed designs, the Print Then Cut feature ensures your labels look polished and professional every time. Additionally, understanding wiring basics can help you better troubleshoot or customize your machine setup for optimal results.
Custom Material Options
Ever wondered how many different materials you can use to create custom labels with your Cricut Maker or Explore machine? The options are surprisingly diverse, allowing you to tailor labels to your specific needs. First, vinyl is popular for durable, waterproof labels suitable for jars, bottles, or outdoor items. Second, iron-on material can be used for fabric labels, perfect for clothing or linens. Third, cardstock or printable sticker paper enables you to craft colorful, decorative labels for organizers or gifts. These materials expand your creative possibilities beyond standard sticker sheets. You can experiment with textures, finishes, and adhesion qualities, making your labels both functional and visually appealing. With the right material choice, your DIY labels can match any project or environment effortlessly.

Avery Waterproof Labels with UltraHold Permanent Adhesive, 2" x 4", 500 Labels for Laser Printers (5523)
Avery Waterproof Labels can be completely submerged in water without falling apart and are resistant to scuffing, tearing…
As an affiliate, we earn on qualifying purchases.
As an affiliate, we earn on qualifying purchases.
Applying Packing Tape and Printed Graphics for Durable Labels

Applying packing tape and printed graphics creates a simple, cost-effective method for durable labels, especially when you need a quick, customizable solution. First, print your design on standard paper or label sheets, making sure it’s slightly smaller than the tape width. Cut out the design neatly. Next, place the printed graphic on a flat surface and carefully lay a strip of clear packing tape over it, smoothing out air bubbles. Once sealed, trim any excess tape around the edges. To make the label waterproof and permanent, immerse the taped graphic in water for about 30 seconds. Gently rub off the paper backing, leaving only the waterproof tape with your design. This method provides a sturdy, weather-resistant label perfect for storage, boxes, or outdoor items. Additionally, contrast ratio plays a key role in ensuring your labels remain visible and legible under various lighting conditions.
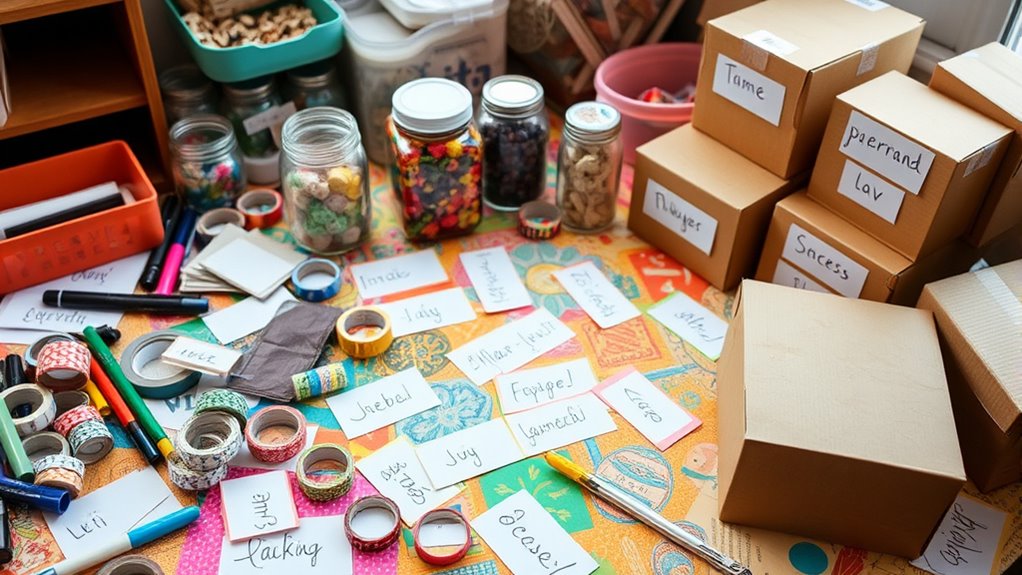
Repurposing Household Items Like Painter’s Tape and Markers

You can easily create functional labels using common household items like painter’s tape and markers, making it a practical choice for quick organization. This method is simple, inexpensive, and customizable for various surfaces. To enhance your labels, consider these options:
- Use different colored markers to categorize items quickly.
- Write clear, legible text and add symbols for visual cues.
- Cut painter’s tape into smaller strips for labeling drawers, jars, or files.
This approach allows you to personalize labels, change them easily, and reuse materials as needed. Painter’s tape sticks well without leaving residue, and markers come in various colors for added clarity. It’s an effective, low-cost solution perfect for temporary or semi-permanent labeling around your home.
Utilizing Post-it Notes and Chalkboard Stickers for Temporary Labels

Using Post-it notes and chalkboard stickers offers an easy and reusable way to label your belongings without permanent commitment. These options are cost-effective and require minimal materials, making them perfect for quick organization. Plus, their versatility lets you update labels easily, keeping your space flexible and clutter-free. In addition, these labeling methods can be safely removed without damaging surfaces, maintaining your home’s safety and integrity. safe labeling methods
Easy and Reusable
For quick and temporary labeling needs, household items like Post-it notes and chalkboard stickers offer an easy and reusable solution. These materials let you label items without permanent marks, making changes simple. To maximize their effectiveness, consider these tips:
- Use different colors or sizes to categorize items quickly.
- Write neatly or use stencils for clarity, especially if labels are visible from a distance.
- Reuse by peeling and repositioning on clean surfaces, avoiding residue or damage.
Post-it notes are perfect for short-term labels on boxes or shelves, while chalkboard stickers work well for containers you frequently access. Both options save money and reduce waste, making organization flexible and eco-friendly.
Cost-Effective Solutions
Cost-effective solutions like Post-it notes and chalkboard stickers provide flexible, temporary labeling options that require minimal investment. Post-it notes are quick to apply and easy to move, making them perfect for temporary labels on storage bins, files, or shelves. Their adhesive allows for simple repositioning without damage. Chalkboard stickers offer a reusable option; you can write on them with dry erase markers and erase as needed, ideal for items that change labels frequently. Both options eliminate the need for specialized equipment or expensive supplies. They’re readily available at home or office supply stores, making them accessible and affordable. Plus, they allow for quick updates and adjustments, helping you stay organized without breaking the bank. Reusability of chalkboard stickers
Versatile Organization Options
Post-it notes and chalkboard stickers offer flexible, easy-to-implement solutions for temporary organization. They allow you to label items quickly and update labels as needed without permanent commitment. To maximize their usefulness, consider these options:
- Use different colors for categories, such as blue for documents and yellow for supplies, making visual sorting easier.
- Write clear, concise labels with permanent markers or chalk, ensuring readability from a distance.
- Attach labels to containers, shelves, or drawers, then remove or change them when your organizational needs evolve.
- Incorporating sound therapy principles into your routines can also help improve focus and reduce stress during organization tasks.
These methods are ideal for seasonal storage, classroom setups, or shared spaces. They’re inexpensive, reusable, and adaptable, giving you an effective way to stay organized without investing in costly equipment.
Making Labels With Commercial Adhesive Systems Like Xyron and Epson Labelers

Commercial adhesive systems like the Xyron Creative Station and Epson LabelWorks offer efficient solutions for creating durable, professional-looking labels. With the Xyron, you simply run paper or printed designs through the machine, which applies a permanent adhesive and cuts out the shape, turning your artwork into a sticker. The Epson LabelWorks printer allows you to print directly onto specialized tapes in various colors and widths, giving you customizable, vibrant labels. These systems eliminate the need for separate glues or adhesives, providing a clean and quick process. You can design labels with text, borders, or images, then produce them in multiple sizes. They’re perfect for crafting labels that stick securely on containers, files, or equipment, giving your organization a polished, professional appearance without investing in a dedicated label maker. Additionally, smart appliances can help streamline the labeling process even further when integrated with connected home systems.
Printing Labels on Standard Inkjet or Laser Printer Using Printable Label Sheets

Using your home or office inkjet or laser printer, you can easily create customized labels by printing directly onto printable label sheets. This method offers a simple, cost-effective way to produce professional-looking labels without specialized equipment. To get started, choose the right type of label sheets compatible with your printer—either inkjet or laser. Confirm your design software allows for precise layout and color control. Vetted label sheets ensure compatibility and quality, making the printing process smoother and more reliable.
Create professional labels easily using your home inkjet or laser printer with printable label sheets.
- Select appropriate label sheets based on your printer type and project needs.
- Design your labels with clear fonts, vibrant colors, and any images or borders you want.
- Print a test sheet first to check alignment, then print your final labels for clean results.
This approach gives you flexibility and creative control while keeping costs low.
Crafting Unique Labels With Reusable Materials and Creative Techniques

If you want to create distinctive labels without investing in specialized equipment, you can get creative with everyday household materials and simple techniques. Use painter’s tape or chalkboard stickers for reusable surfaces, then write directly with permanent markers or chalk markers for customization. Post-it notes are perfect for temporary labels, easily removable and repositionable. Repurpose mailing labels or cut-out scrapbook paper for unique designs, attaching them with glue or double-sided tape. For a more artistic touch, embellish with stamps, stencils, or hand-drawn illustrations. Water-based techniques like using packing tape and printed graphics can create durable, reusable labels by sealing printed designs under clear tape. Additionally, labeling techniques such as using printable adhesive sheets or customizing jar lids can enhance your organization efforts. These methods allow you to craft personalized, eco-friendly labels while saving money and adding a creative flair to your organization.
Frequently Asked Questions
Can I Make Waterproof Labels at Home Without Specialized Equipment?
Yes, you can make waterproof labels at home without specialized equipment. Use printable waterproof label paper or laminate your printed labels with clear adhesive or packing tape. Seal the edges thoroughly to prevent water from seeping in. For extra durability, consider using permanent markers on waterproof labels or applying a clear waterproof spray. These methods offer a cost-effective way to create weather-resistant labels with materials you already have.
How Durable Are DIY Labels Compared to Commercial Options?
If you’re thinking about durability, DIY labels vary. Using waterproof materials like laminated paper or waterproof tape, combined with permanent markers or spray adhesives, can make your labels quite resilient—sometimes comparable to commercial options. However, they may not last as long under extreme conditions like heavy moisture or UV exposure. For everyday use, DIY labels can be surprisingly durable, but for harsh environments, commercial labels with industrial adhesives tend to outperform homemade ones.
What Materials Are Best for Outdoor or Moisture-Prone Labels?
For outdoor or moisture-prone labels, you should use waterproof materials like vinyl or laminated sticker paper. These resist water, UV rays, and weather conditions better than standard paper options. You can also seal paper labels with clear waterproof spray or laminate sheets. Applying permanent, waterproof adhesive guarantees your labels stay intact and legible despite exposure to outdoor elements or moisture, making them ideal for garden markers, shipping labels, or storage containers used outdoors.
Is It Possible to Create Multi-Layer or Embossed Labels DIY?
You can absolutely craft multi-layer or embossed labels at home, turning simple projects into tactile delights. Use foam or thick paper for the raised layers, gluing or layering them carefully for depth. Embossing can be achieved with heat tools or by pressing textured materials onto your labels. With some patience and creativity, your labels will stand out beautifully, adding a professional touch even without fancy equipment.
Can I Print QR Codes or Barcodes With These Alternative Methods?
Yes, you can print QR codes and barcodes with these alternative methods. Using your home printer, generate the code with free online tools or design software, then print on sticker paper or labels. For Cricut machines, import barcode or QR code images into your design, then cut or print. Just verify the codes are high-resolution and properly sized for scanners, and you’ll have functional labels without expensive equipment.
Conclusion
Now that you know these budget-friendly label-making options, why spend a fortune on a specialized machine? With your home printer, craft cutters, and everyday household items, you can create customized, durable labels that suit any project. Isn’t it satisfying to turn simple materials into professional-looking labels? Give these ideas a try and enjoy the creative process—you’ll be surprised at what you can achieve without breaking the bank.