To install a simple closet system yourself, start by measuring your space and gathering basic tools like a level, drill, stud finder, and safety gear. Mark and locate studs, then attach wall rails and supports securely. Assemble the vertical dividers, support brackets, and shelves, ensuring everything is level and aligned. Mount hanging rods, finish with trim or accessories, and double-check all hardware for stability. If you follow these steps closely, you’ll create a sturdy, organized closet—more tips will help simplify the process further.
Key Takeaways
- Measure and plan your space carefully, including wall dimensions and desired shelf and rod placements.
- Gather and organize essential tools, safety gear, and materials before beginning installation.
- Locate wall studs and mark mounting points; use level and tape measure for precise alignment.
- Install steel rails and support brackets securely into studs, then assemble shelves and rods following manufacturer instructions.
- Finish with final adjustments, conceal hardware, and add trim or paint for a polished, functional closet system.
Planning Your Closet Space and Gathering Tools
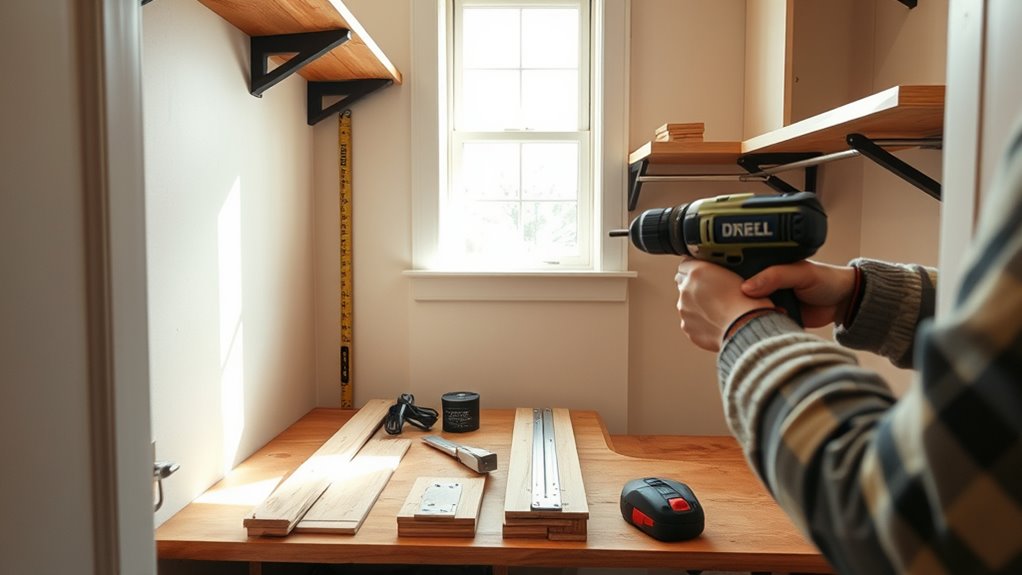
Before you start building your custom closet, preparing your space carefully is vital. First, measure your closet’s dimensions accurately—width, height, and depth—to guarantee your components fit perfectly. Use a level to check wall straightness and a stud finder to locate wall studs—these are your best anchor points. Mark stud locations with masking tape so you can remove markings easily later. Gather all necessary tools: a drill, impact driver, level, tape measure, saws, and screwdrivers. If your kit includes templates, review them thoroughly for proper placement. You might need to modify the space by cutting or removing baseboards if the tower unit sits on the floor or mounts on the wall. Proper planning and tool prep set a solid foundation for a smooth installation process. Additionally, understanding support breakfast options can inspire you to include comfortable seating or cozy accents in your closet space for a more inviting environment.
Installing the Wall Rails and Supports

To securely install the wall rails and supports, start by locating the wall studs using a magnetic stud finder. Mark the stud locations on the wall with masking tape for easy removal later. Measure and cut the steel rails to the specified lengths using an angle grinder or hacksaw. Align the rails with the marked studs and attach them using an impact driver and appropriate screws. Where studs aren’t available, use drywall toggle screws for added support. Make certain the rails are level before tightening. Attach mounting cleats to the studs with lag bolts or screws drilled into pilot holes. Confirm all pieces are straight and secure. Properly installed rails will provide a sturdy foundation for your closet system and ensure everything stays in place. Stud detection is a crucial step to ensure the supports are anchored securely into the wall for long-lasting stability.
Assembling the Vertical Structures and Dividers
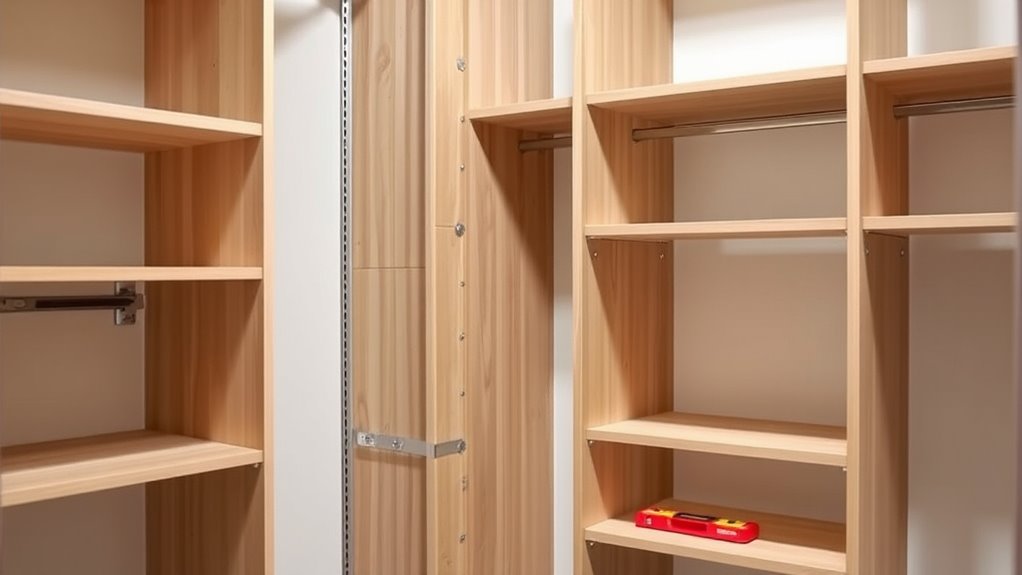
Assembling the vertical structures and dividers starts with placing the pre-cut notches on the vertical closet panels, which allows you to easily position them onto the installed rails without any modifications. Align the notches with the rails and slide the panels into place, ensuring they sit flush and stable. Use a level to confirm they are perfectly vertical before fastening. If your kit includes dividers, layer plywood spacers or cut-to-size panels to create custom-width sections. Lock the verticals together using the manufacturer’s bolts and cams, following their instructions carefully. Position dividers at desired intervals, securing them firmly to prevent shifting. This process defines your closet’s sections, providing structural support and neat separation for shelves, rods, and accessories. Paying attention to proper alignment ensures your closet remains stable and functional over time.
Installing Shelves and Adjustable Components

Wondering how to securely install shelves and make them adjustable? First, position your shelves on the vertical supports or brackets. Use a quarter-turn screwdriver to lock cam shelves into place, ensuring they’re stable. For adjustability, insert shelf pegs into the bottom-side cams, allowing you to shift shelves up or down as needed. When installing the top wooden shelf, attach brackets to the tower unit first, then mark matching spots on the wall for wall brackets. Use a level to ensure even placement. Secure brackets with screws—3/4 inch into plywood and 1 1/2 inch into drywall with anchors. Always double-check measurements before drilling. Incorporating precision and automation can help you achieve a more accurate and durable setup, ensuring your shelving system is both flexible and sturdy.
Mounting Hanging Rods and Hardware
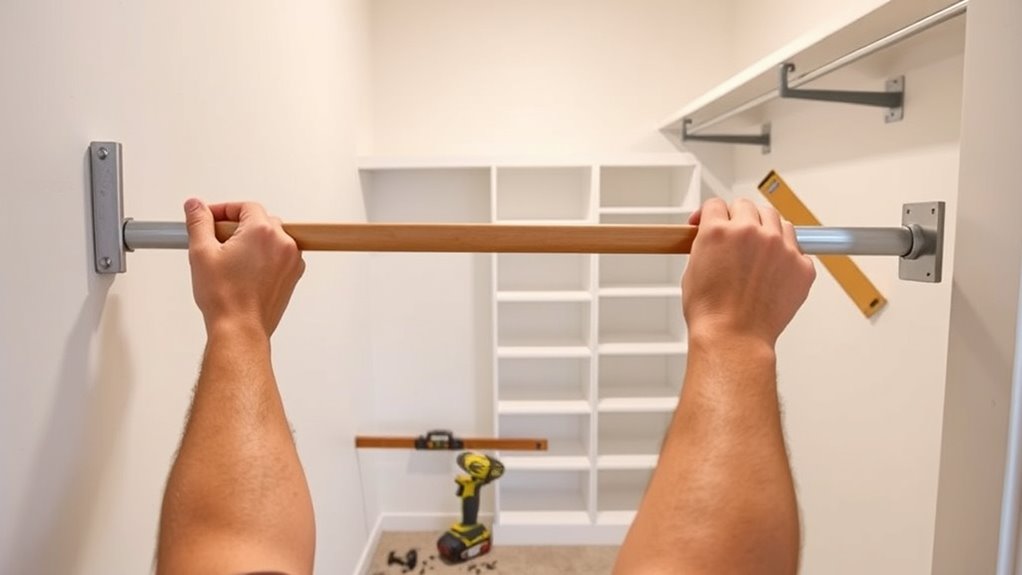
Mounting hanging rods securely is essential for a functional closet, and proper hardware guarantees stability and safety. First, measure and mark the desired height on your tower or wall, using a level to ensure straight placement. Insert the rod brackets into pre-drilled holes or mount them directly into wall studs with lag bolts or screws. Use a drill with appropriate bits to tighten the screws firmly into the wall or studs. Cut the rods to length with a hacksaw or pipe cutter, ensuring a clean edge. Insert the rods into the brackets, then tighten set screws to lock them in place. Confirm the stability by gently testing the rods’ strength before hanging clothes. Proper hardware and secure mounting prevent sagging or accidents, keeping your closet organized and safe. Additionally, being aware of wall stud locations can help ensure your hardware is anchored into a solid structure for maximum support.
Final Touches: Finishing and Accessorizing

Once you’ve installed all the shelves and rods, it’s time to add those finishing touches that make your closet look polished. Concealing screw holes with matching wood plugs instantly creates a seamless appearance, while decorative touches like trim or paint can elevate the overall style. These small details really tie everything together and give your DIY project a professional finish. Incorporating natural materials can also help your custom closet blend effortlessly with your home’s aesthetic and promote eco-friendly practices.
Concealing Screw Holes
Have you ever noticed unsightly screw holes lingering after finishing a closet project? To achieve a clean, professional look, conceal these imperfections with wood filler or spackle that matches your closet’s finish. Apply the filler smoothly with a putty knife, pressing it into the holes. Let it dry according to the manufacturer’s instructions. Once dry, sand the area lightly with fine-grit sandpaper until smooth and flush with the surface. If needed, repeat the process for deeper holes. For a seamless appearance, stain or paint over the filled areas to match the rest of your closet. This simple step guarantees your DIY project looks polished and well-crafted, giving your closet a clean, finished appearance free of distracting screw holes. Incorporating sustainable materials can also enhance the longevity and eco-friendliness of your closet remodel.
Adding Decorative Touches
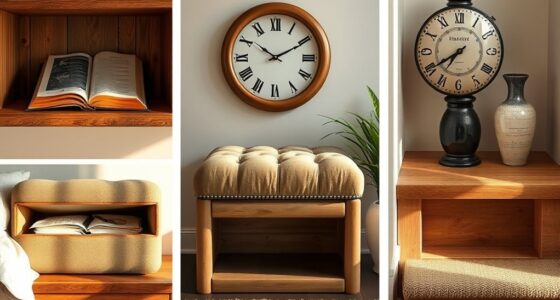
After filling and sanding screw holes for a smooth finish, adding decorative touches can truly elevate your closet’s look. Start by installing matching wood plugs in visible screw holes, then sand and stain or paint them for a seamless appearance. Consider adding decorative trim or molding along shelves and edges to create a polished look. Incorporate stylish hardware, such as elegant drawer pulls and rod brackets, to enhance visual appeal. Use peel-and-stick wallpaper or paint the interior walls a complementary color for contrast. Small details like decorative labels on storage bins or baskets can also add personality. Additionally, incorporating proper ventilation can help maintain the freshness of your closet and prevent mustiness. These finishing touches personalize your closet, making it both functional and visually appealing without requiring significant extra effort.
Tips for a Smooth DIY Installation Process

To make certain your DIY closet remodel goes smoothly, start by gathering all the necessary tools beforehand to avoid delays. Next, measure and mark your space carefully to guarantee everything fits perfectly and aligns properly. Finally, follow the manufacturer’s instructions closely to prevent mistakes and make the installation process straightforward. Paying attention to visual and auditory cues can also help ensure precise placement and alignment throughout your project.
Gather Necessary Tools
Gathering all the necessary tools before starting your closet remodel is essential for a smooth and efficient project. You’ll want a tape measure, level, stud finder, power drill, screwdriver bits, saw (such as a hacksaw or jigsaw), utility knife, and safety gear like goggles and gloves. A step ladder or sturdy stool will help reach high areas. Keep a pencil or marker handy for marking measurements. If you’re cutting metal rails or wood shelves, guarantee you have the appropriate blades or discs. Organize your tools nearby on a workbench or in a toolbox to avoid interruptions. Having everything ready before you begin minimizes delays and keeps your project on track, making the entire installation process safer and more manageable. Ensuring your tools are well-maintained and suitable for the task helps improve safety and efficiency during your project power tools.
Measure and Mark Carefully
Accurate measurement and precise marking set the foundation for a successful closet remodel. Take your time to double-check each measurement before making marks on the wall. Use a level to ensure your lines are straight, and a stud finder to locate wall studs, which are ideal for mounting hardware. Mark stud locations on masking tape to avoid damaging walls and make removal easier later. When marking positions for shelves and rods, measure carefully from a fixed point to ensure everything lines up correctly. Use a pencil for marks, so they’re easy to erase if needed. Always verify your measurements before drilling or screwing. Proper planning at this stage prevents misalignment and ensures a smooth installation. Incorporating safe installation practices helps prevent potential issues and ensures your closet system is secure and durable.
Follow Manufacturer Instructions
Following the manufacturer’s instructions carefully guarantees your closet remodel goes smoothly. Read each step thoroughly before starting, so you understand the entire process and avoid mistakes. Pay close attention to details like screw sizes, placement, and sequencing—skipping steps can compromise stability or alignment. Use the recommended tools and hardware; using the wrong ones might damage components or make assembly harder. Follow specific guidelines for mounting, such as how deep to drill or where to place support brackets. Don’t rush; take your time to ensure each piece fits correctly. If you encounter unclear instructions, consult the manufacturer’s website or customer support. Proper assembly techniques are essential for ensuring your closet system is sturdy, functional, and looks professionally installed.
Frequently Asked Questions
Can I Customize the Closet System for Irregular or Angled Walls?
Yes, you can customize the closet system for irregular or angled walls. Measure carefully and mark the exact angles and curves on your wall. Use a flexible measuring tape and a level to trace these shapes accurately. Cut shelves and support pieces with a jigsaw to fit the angles precisely. Attach mounting cleats securely, adjusting for the wall’s irregularities, and use shims if needed for a stable, seamless fit.
What Safety Precautions Should I Follow During Power Tool Use?
Safety is your shield when using power tools—think of it as armor for your project. Always wear safety goggles and hearing protection, and keep your workspace clear of clutter. Use sharp blades carefully, and verify power is off before changing attachments. Follow manufacturer instructions, and avoid loose clothing or jewelry that could catch. Stay alert, and never rush; your safety is the foundation of a successful, injury-free project.
How Do I Prevent Damage to Drywall or Paint When Installing Supports?
To prevent drywall or paint damage, you should first mark your stud locations accurately with a magnetic stud finder, then use painter’s tape over your markings. When drilling or screwing, drill slowly and gently to avoid cracking or chipping the drywall. Use proper anchors for unsupported areas, and avoid over-tightening screws. Finally, cover nearby surfaces with painter’s tape or drop cloths to protect against accidental scratches or marks.
Are There Alternative Materials for Shelves Besides Wood?
You can definitely upgrade your closet with materials beyond wood—think about sleek glass for a modern touch or sturdy metal for industrial flair. Plastic shelves are lightweight and budget-friendly, perfect for lightweight items. Acrylic offers a crystal-clear, elegant look, while wire racks provide excellent ventilation. Each alternative adds a unique style and function, transforming your space into a sophisticated sanctuary that reflects your personality and elevates your organization game.
How Can I Modify the Design for Additional Storage Needs Later?
To modify your design for extra storage later, plan for adjustable shelves and add extra support brackets now. Use a modular system that allows you to easily swap or expand components. Incorporate vertical dividers or extra hanging rods to maximize space. Leave some wall space open for future additions, and choose versatile materials like wire or laminate that can be easily integrated or replaced as your storage needs grow.
Conclusion
With your closet now transformed into a sleek, organized haven, you’ve turned chaos into calm with your own hands. Like a master artist, you’ve painted a functional masterpiece that reflects your style and effort. Remember, each shelf and rod is a brushstroke of practicality. Keep your space tidy and your DIY spirit alive—your closet’s new harmony is a shining affirmation to what you can create with a little determination and a lot of heart.