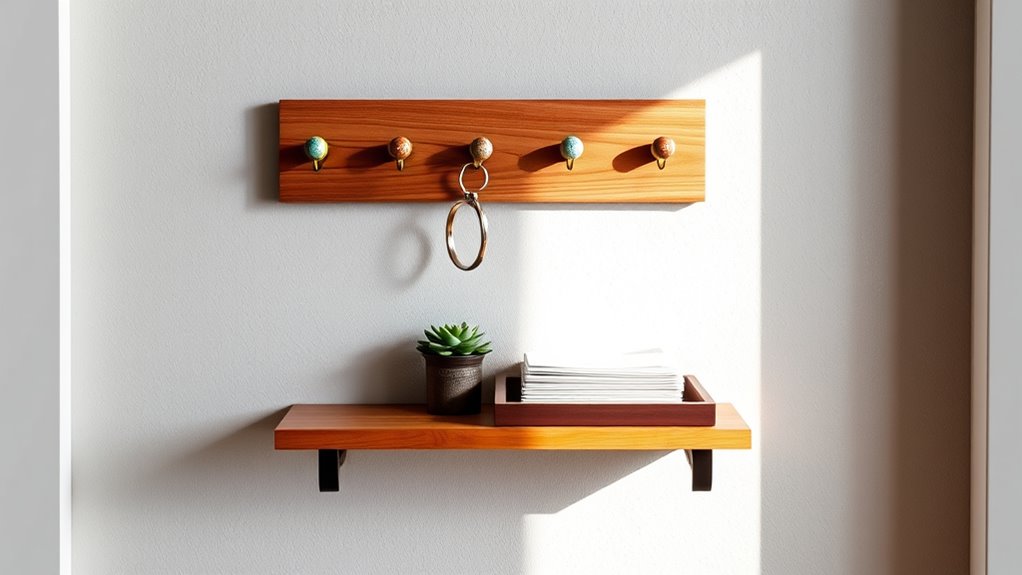

To create a DIY entryway organizer with a key holder and mail station, start by selecting durable materials like quality wood and gathering the right tools such as a saw and drill. Plan your layout, cut and sand pieces, then assemble the mail slot, tray, and key area using hardware and fasteners. Finish with paint or stain for style. Mount your organizer securely on the wall and personalize it with decorative touches—keep going to discover all the step-by-step tips!
Key Takeaways
- Measure available space and plan a layout for hooks, mail slots, and shelves to optimize functionality and aesthetics.
- Choose durable materials like wood or scrap pine, and gather necessary tools such as a saw, drill, and clamps.
- Assemble components with precise measurements, ensuring right angles and secure fastening, then sand and finish surfaces smoothly.
- Install hardware securely on the wall, including hooks, mail compartments, and a key holder, using level and pilot holes for stability.
- Personalize the organizer with paint, stains, decorative hardware, and accessories to match your home decor and style preferences.
Planning Your Entryway Organizer Design

Before you start building your entryway organizer, it’s essential to plan its design to make certain it meets your needs and fits your space. Begin by evaluating the available area and deciding what features you want, such as hooks for keys, mail slots, or shelves for small accessories. Sketch a rough layout to visualize how everything will fit together. Consider the size and placement of each component, ensuring it’s accessible without blocking doors or walkways. Think about your style preferences—do you want a rustic look or a sleek modern finish? Determine the number of hooks, mail compartments, and any extra storage you need. This planning step helps you stay organized and ensures your finished organizer functions perfectly in your entryway. Additionally, incorporating customization options can enhance the functionality and aesthetic appeal of your project.
Selecting the Right Materials and Tools

Choosing the right materials and tools is essential to building a sturdy and attractive entryway organizer. You want durable, easy-to-work-with items that match your design vision. Selecting quality wood assures longevity and a polished look, whether scrap 1×6 boards or edge-glued pine. Using appropriate fasteners like brad nails or wood screws guarantees secure assembly. Finishing supplies such as stain and polyurethane protect your project, while hooks and pegs add functionality. The right tools make the process smoother—think miter saw for precise cuts, drill with a Forstner bit for peg holes, and clamps to hold pieces steady. Remember to consider piercing care and hygiene when handling hardware or cleaning your tools to prevent contamination.
Cutting and Preparing Wood Pieces

Start by gathering all your selected wood pieces, such as scrap 1×6, 1×3 boards, or edge-glued pine, and measure each component according to your design plan. Use a tape measure and a square to mark precise cut lines for the shelves, mail tray, and side panels. Set your miter saw to the correct angles, especially if you’re cutting pieces at 45º or other angles for the mail slot. Cut all pieces carefully, ensuring clean, straight edges. Sand each cut edge lightly with fine-grit sandpaper to smooth out rough spots and prepare the surface for staining or finishing. Double-check your measurements before making each cut to avoid mistakes. Proper preparation now makes assembly easier and ensures a professional-looking finished organizer. Additionally, referencing cutting techniques can help achieve cleaner, more accurate cuts for a polished final product.
Assembling the Mail Slot and Tray Components

Assembling the mail slot and tray components requires careful alignment to guarantee a secure and functional design. First, position the mail slot and tray pieces on your work surface, ensuring the dimensions match your plan. Use a square to verify right angles and proper spacing. Secure the mail slot to the tray’s top edge with wood glue, then reinforce with brad nails or screws. Double-check the alignment before the glue dries. Clamp the parts together to maintain stability. Drill pocket holes or pre-drill holes for mounting hardware if needed. Ensure the tray’s bottom is angled at 45º, and the mail slot fits snugly. Proper assembly prevents mail from slipping and maintains the overall aesthetic of your entryway organizer.
- Align components precisely before gluing or nailing
- Use clamps to hold pieces during drying
- Double-check measurements for accuracy
- Pre-drill holes for hardware to prevent splitting
- Confirm mail slot fits securely within the tray
- Proper assembly techniques help ensure durability and safety in your project
Creating the Key Holding Area With Dowels or Hooks

To create an effective key holding area, you’ll need to decide whether to use dowel pegs or hooks based on your preference and available space. Dowel pegs are ideal if you want a sleek, uniform look and enough space for multiple keys on each peg. Measure and mark the spacing—about 3 inches apart—for consistent placement. Drill ⅜-inch deep holes using a drill with a Forstner bit, ensuring they’re level and aligned. Insert the dowels with a bit of wood glue for added stability. If you prefer hooks, evenly space cup hooks or utility hooks on a horizontal board, ensuring they don’t crowd each other. Secure the hooks firmly, leaving enough room for keys to hang freely without tangling. Both options keep keys organized and easily accessible, and incorporating European-inspired designs can enhance the aesthetic appeal of your entryway.
Attaching Hooks for Accessories and Sunglasses

Attaching hooks for accessories and sunglasses is a straightforward step that adds both functionality and style to your entryway organizer. It’s easy to customize based on your needs and available space. First, decide where you want the hooks to go—near the key holder, mail station, or on a dedicated side panel. Use a drill to create pre-drilled holes to prevent splitting. Secure hooks with screws or nails, ensuring they’re level. Consider spacing them evenly for an organized look. Here are some tips to enhance your project:
Attaching hooks adds style and organization to your entryway with easy customization and proper installation.
- Choose different hook types (cup hooks, utility hooks) for variety
- Use a level to ensure perfect alignment
- Opt for sturdy hooks to hold heavy accessories
- Install at varying heights for diverse item sizes
- Match hook finishes with hardware for cohesive style
- Proper hook installation is essential for safety and durability.
Sanding and Applying Finishes for a Polished Look

Before applying any finishes, it’s vital to sand all surfaces thoroughly to achieve a smooth, professional look. Use fine-grit sandpaper (around 220 grit) to gently smooth edges and surfaces, removing splinters or rough spots. Pay special attention to corners and detailed areas for an even finish. Wipe the dust away with a tack cloth or damp rag to guarantee a clean surface. Next, choose your preferred stain or finish, applying it with a clean cloth or brush in even, thin coats. Allow each coat to dry completely before lightly sanding again for a flawless appearance. Finish with a clear polyurethane coat to seal and protect your project, enhancing durability and giving it a polished, professional look. Let the final coat cure fully before mounting your organizer.
Securing Hardware and Mounting the Organizer on the Wall

Securing hardware properly is essential to guarantee your organizer stays stable and safely mounted on the wall. Choose strong hardware suited for your wall type—drywall, plaster, or brick. Use a level to ensure your organizer hangs straight. Drill pilot holes for screws or hooks to prevent wood splitting and ensure a tight fit. Attach mounting hardware like D-rings, sawtooth hangers, or screws through the backboard, depending on your chosen method. Once mounted, double-check stability by gently tugging on the organizer. Proper hardware placement and secure fastening prevent accidents and damage. Additionally, understanding the mounting options available can help you select the most secure method for your specific wall material.
Customizing Your Organizer With Personal Touches

Adding personal touches to your organizer transforms a simple project into a unique reflection of your style. You can customize it with paint, stains, or stenciled quotes that match your home decor. Consider adding decorative hardware, like vintage knobs or colorful hooks, to enhance visual appeal. Incorporate small accessories such as personalized name tags or engraved plaques for a special touch. Using custom paint colors or patterns can make your organizer stand out. Below is a quick reference for personalization ideas: personalization techniques
Tips for Maintaining and Updating Your Entryway Organizer

To keep your entryway organizer functioning well and looking great, regular maintenance is key. Check for loose hardware, tighten screws, and reapply stain or polyurethane as needed to refresh the finish. Clean dust and dirt from surfaces to prevent buildup that can damage wood over time. Update hooks and pegs periodically to accommodate changing needs or add more storage. Rearrange or add decorative elements like labels or small accessories to personalize your space. Regularly inspect for signs of wear or damage, repairing or replacing parts promptly. Additionally, staying informed about market trends in home organization can inspire new ideas and improvements.
Frequently Asked Questions
How Can I Make My Organizer More Weather-Resistant for Outdoor Use?
To make your organizer weather-resistant, you should use outdoor-grade materials like pressure-treated wood or cedar, which resist moisture and decay. Apply a waterproof sealant or exterior-grade polyurethane to protect the finish from rain and sun. Additionally, consider sealing all joints and hardware with rust-proof coatings or stainless steel fasteners. Mount it securely on a wall or post to prevent water pooling, and add protective covers over hooks and mail slots.
What Are Alternative Materials if I Don’t Have Access to Wood?
If you don’t have access to wood, consider using weather-resistant materials like plastic, metal, or composite boards. Plastic crates or storage bins can be repurposed for hooks and mail trays, while metal sheets can be shaped into sturdy organizer components. You can also use PVC pipes or galvanized steel for durable key holders. Just verify the materials are sealed or coated to withstand outdoor conditions and prevent rust or decay.
How Do I Ensure the Organizer Is Level When Mounting?
You can guarantee your organizer is level by using a spirit level or a laser level during installation. First, mark your mounting points, then place the level along the top or sides to check if the line is straight. Adjust the mounting hardware as needed before securing it fully. Double-check with the level after mounting to confirm everything stays even, preventing a crooked display and ensuring a professional look.
Can I Modify the Size to Fit a Smaller Entryway?
Yes, you can definitely modify the size to fit a smaller entryway. Measure your available space carefully, then scale down the dimensions proportionally for the shelf, mail slot, and hooks. Use smaller hardware and optimize the layout to maximize functionality without overcrowding. Adjusting the proportions ensures your organizer fits perfectly, maintains stability, and keeps your entryway organized and inviting. Just plan your design before cutting and assembling.
What Are Some Creative Ways to Personalize the Design?
You can personalize your entryway organizer by painting it in your favorite colors, adding custom decals or stencils, or attaching decorative hardware like vintage hooks or knobs. Incorporate personal touches such as your family’s initials, meaningful quotes, or artwork to make it uniquely yours. Using different stain shades or adding patterned wallpaper to the back panel also brings personality and style, making your entryway both functional and visually appealing.
Conclusion
With a bit of effort, your DIY entryway organizer transforms chaos into order, making daily routines smoother. Don’t worry about imperfections—adding a fresh coat of paint or some personal touches gives it character and charm. Even if you’re new to woodworking, your finished piece will feel rewarding and uniquely yours. Soon, you’ll enjoy a clutter-free space that welcomes you home every day, proving that a little DIY effort goes a long way.