
To craft a DIY magnetic spice rack, choose a strong magnetic base, like stainless steel or ferrous metal, and cut it to fit your space. Attach neodymium magnets to small spice jars with epoxy for a secure hold, then arrange them on the magnetic surface in a pattern that saves space and looks neat. Label everything clearly for easy access. If you keep exploring, you’ll discover more tips to make your setup both functional and creative.
Key Takeaways
- Select durable magnetic materials and small magnetic jars with compatible lids for secure attachment and easy organization.
- Measure and plan your layout—vertical, grid, or honeycomb—to maximize space and accessibility.
- Attach neodymium magnets to jar lids with epoxy, then securely mount the magnetic plate to the wall or cabinet.
- Arrange spices alphabetically, by use frequency, or with color-coding, using uniform labels for quick identification.
- Perform regular maintenance, check magnet strength, and customize jars to match your kitchen decor for a personalized setup.
Selecting Suitable Materials for Your Magnetic Spice Rack

Choosing the right materials is essential for building a durable and effective magnetic spice rack. Start with a magnetic stainless steel or ferrous metal plate, ensuring it’s large enough to hold all your jars securely. Not all stainless steel is magnetic, so double-check the specifications. Use small magnetic spice jars or tins, typically 2-4 oz, with metal lids that can attach to magnets. Strong magnets like neodymium (3-5 kg pull strength) are recommended, with two or three per jar for stability. Secure the magnets to jar lids with durable epoxy, allowing 24 hours to cure. For mounting, gather wall anchors, screws, and a drill. Optional labeling materials, such as chalkboard lids or labels, help keep your spices organized and easily identifiable. Incorporating European cloud innovation in your planning can inspire more sustainable and secure storage solutions for your kitchen.
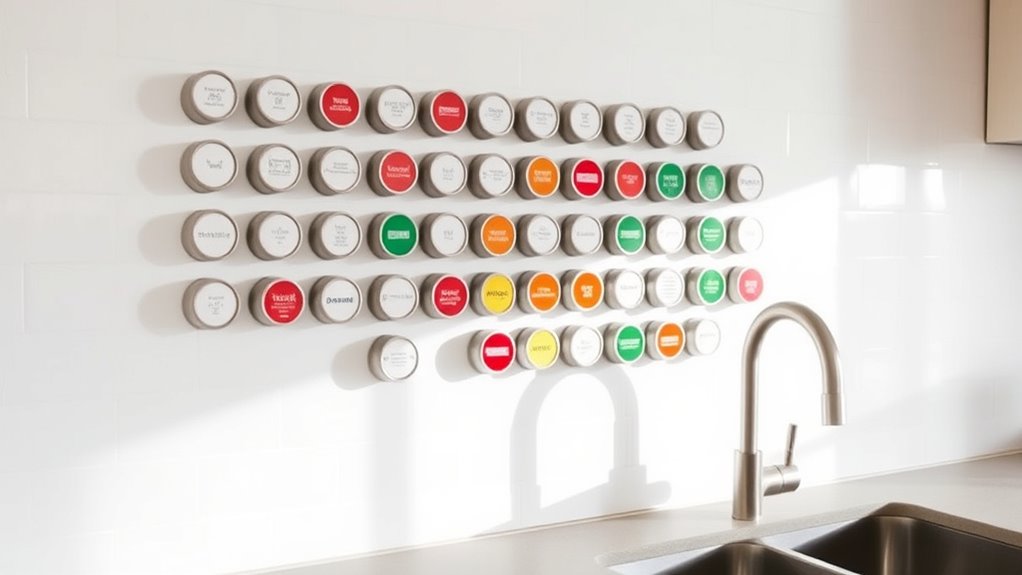
Planning Your Design and Layout for Optimal Space Saving

When planning your magnetic spice rack, focus on maximizing storage while keeping everything accessible. Measure your wall or cabinet space carefully to determine the size and shape of your setup. Decide on a layout that balances capacity with ease of use—vertical, grid, or honeycomb patterns work well. Think about spacing jars evenly to prevent overcrowding and make labels visible. Consider the weight of filled jars to ensure your magnets are strong enough. Map out where each jar will go before attaching magnets or mounting plates. Here’s a simple example to guide your design: simple systems.
| Layout Type | Advantages | Best For |
|---|---|---|
| Vertical | Saves horizontal space | Small kitchens |
| Grid | Easy to organize and expand | Larger collections |
| Honeycomb | Visually appealing, compact | Aesthetic-focused setups |
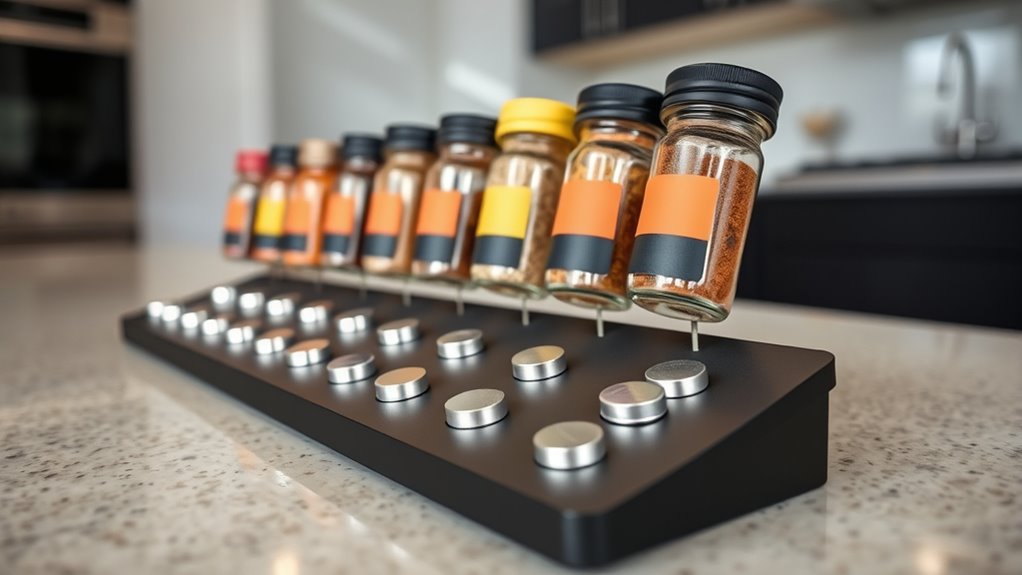
Attaching Magnets to Spice Jars for Secure Mounting

Choosing the right adhesive is vital to keep your magnets firmly attached to the spice jars. You want a strong, waterproof glue like epoxy or industrial-grade super glue for the best results. Test the bond before mounting to guarantee your jars stay secure during everyday use. Ensuring proper adhesive strength is essential for long-term durability.
Choosing Strong Adhesives
To securely attach magnets to your spice jars, selecting the right adhesive is essential. You need a strong, durable glue that can withstand kitchen conditions and hold the magnets firmly over time.
Here are key considerations:
- Use epoxy or industrial-strength superglue for maximum bonding power.
- Ensure the adhesive is waterproof and resistant to heat and humidity.
- Choose a glue that cures clear for a neat finish and avoids mess during application.
Apply the adhesive evenly to the magnet or lid, press firmly, and allow at least 24 hours for full curing. This ensures the magnets stay attached to the metal lids, preventing jars from falling and maintaining a secure, long-lasting hold.
Ensuring Secure Attachment
Attaching magnets securely to spice jars is essential for maintaining a stable magnetic connection during everyday use. To guarantee this, use a strong adhesive like epoxy or industrial glue, applying it evenly to the magnet’s center or edges. Press the magnet firmly onto the metal lid or inside the lid, and hold it in place for several minutes. Allow the glue to cure fully—usually 24 hours—for maximum strength. Test each jar’s magnetic hold before mounting on your rack, adding more magnets if needed for added stability. Make sure the magnet is compatible with the jar lid’s material and surface. Proper adhesion prevents jars from falling or shifting, keeping your spice collection safe and organized. Free Floating backyard ideas can also inspire creative ways to enhance your kitchen or outdoor space for better organization and style.
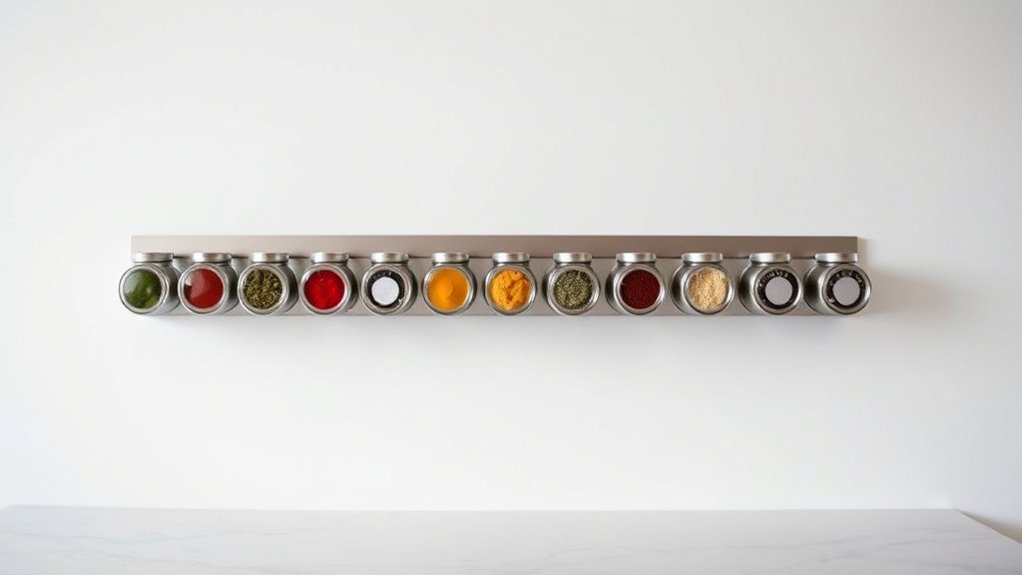
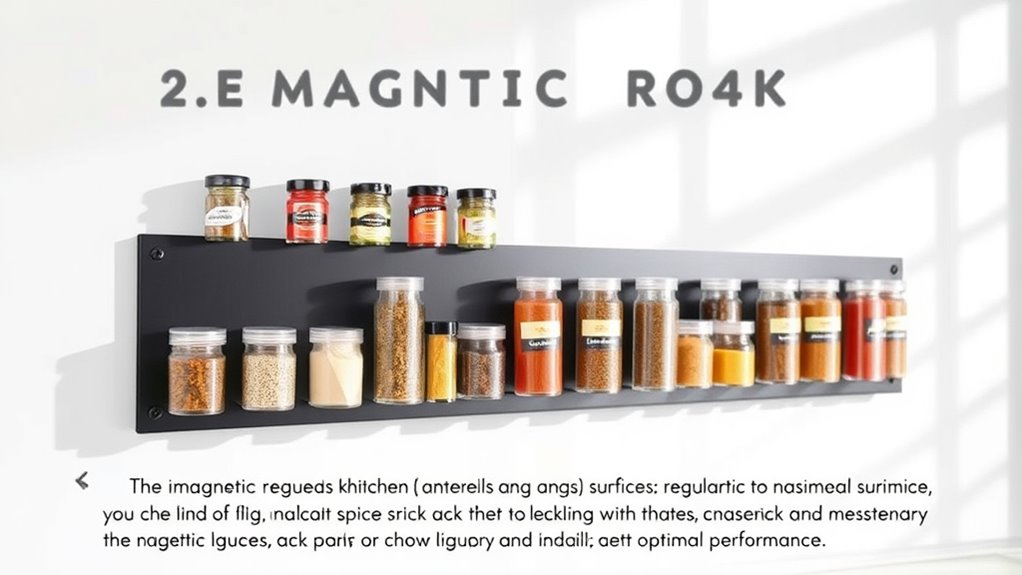
Choosing and Preparing the Magnetic Base or Plate
Start by selecting a magnetic material that’s durable and suitable for your space, like stainless steel or ferrous metal. Measure carefully to determine the right size and cut the plate precisely, ensuring it fits your wall or cabinet area. Make sure your chosen plate is compatible with the magnets you plan to use for a secure and lasting hold. Additionally, consider the aviation regulations related to material safety and strength to ensure your magnetic plate meets necessary standards.
Material Selection Tips
Choosing the right magnetic base or plate is essential for a sturdy and long-lasting spice rack. First, confirm the plate is made of a ferrous metal or magnetic stainless steel; not all stainless steel is magnetic, so test before purchasing. Second, select a size that fits your available space and the number of jars you plan to store. Third, consider durability—opt for rust-resistant materials like stainless steel in humid kitchens. To optimize your project, keep these tips in mind: 1. Verify magnetism with a magnet test to prevent non-magnetic materials. 2. Choose thicker plates for added strength and stability. 3. Use rust-resistant or coated surfaces to withstand moisture over time. Incorporating material durability ensures your spice rack remains secure and visually appealing.
Measuring and Cutting Plate
Have you measured your available space and determined the size of the magnetic plate you’ll need? To start, use a measuring tape to find the width and height of the area where you want to install your rack. Mark these dimensions clearly on your chosen metal surface, whether it’s a scrap piece or a pre-cut plate. When cutting, wear safety gloves and glasses, especially if you’re using power tools. Use a metal-cutting saw or tin snips for a clean cut, and ensure your cuts are straight and smooth. Sand the edges carefully to remove burrs or sharp points, which could damage jars or cut your hands later. Once cut, double-check the size against your space before proceeding to attach magnets or mounting hardware. Ensuring your measurements are accurate helps prevent issues with proper sizing and load‑planning.
Ensuring Magnet Compatibility
How do you guarantee your magnetic base is compatible with your spice jars? First, verify the plate is made of ferrous metal or magnetic stainless steel—test with a magnet if unsure. Second, check the magnet strength needed, especially for full jars, to prevent slipping or falling. Third, confirm the size of your plate matches your available space and jar quantity. To enhance compatibility: 1. Use a sturdy, rust-resistant metal plate for durability. 2. Attach strong neodymium magnets, with 2-3 per jar, for secure holding. 3. Test magnet adhesion before mounting to confirm jars won’t detach during use. Additionally, considering the magnetic properties of materials can help ensure the base’s effectiveness and longevity.
Assembling and Mounting Your DIY Spice Rack on the Wall
Before mounting your DIY spice rack, make certain you have all the necessary tools and materials ready, including a sturdy magnetic metal plate, strong magnets, screws, wall anchors, and a drill. First, decide on the ideal location, ensuring it’s accessible and supports the weight of filled jars. Mark the mounting points on the wall with a pencil, aligning them with your plate’s holes. Drill holes into the wall, insert wall anchors if needed, and screw the plate securely in place. Check levelness before tightening fully. Once mounted, attach your jars to the magnetic surface. Here’s a quick overview:
| Step | Action |
|---|---|
| Marking | Measure and mark mounting points |
| Drilling | Drill holes and insert anchors if necessary |
| Securing | Screw the metal plate into wall |
| Final check | Ensure stability and levelness before use |
Organizing and Labeling Your Spice Collection for Easy Access
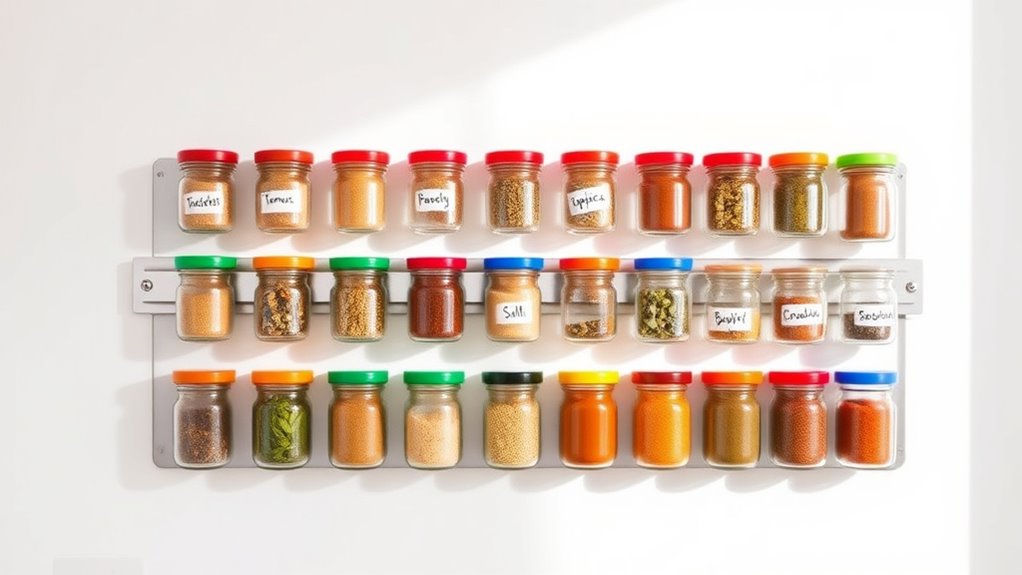
Organizing and labeling your spice collection makes cooking more efficient and reduces frustration. Clear labels help you quickly identify spices without searching. To optimize your setup, consider these key tips:
Organize and label your spices for quicker, easier cooking and less frustration.
- Use uniform labels — whether chalkboard lids, printed labels, or clear stickers — for a consistent look and easy readability.
- Arrange spices alphabetically or by frequency of use, so your most-used seasonings are within reach.
- Incorporate visual cues, like color-coded labels or icons, to differentiate similar spices at a glance.
Maintenance Tips to Keep Your Magnetic Spice Rack in Top Condition
Ever wonder what it takes to keep your magnetic spice rack functioning smoothly over time? Regular maintenance is key. Periodically check that your magnets are still holding jars securely, especially after cleaning or if you notice jars shifting. Clean the metal surface with a damp cloth to remove grease, dust, and debris that can weaken magnet adhesion. Inspect the lids and jars for rust or damage—replace any that show signs of wear to keep spices fresh. Tighten screws and wall anchors if the rack feels loose or wobbly. If you notice magnet strength diminishing, consider upgrading to stronger neodymium magnets. Additionally, understanding modern kitchen technology can help you choose the most efficient storage solutions. Finally, keep labels clear and legible by wiping them gently, ensuring quick access and organization. These simple steps will prolong your rack’s lifespan and keep spices accessible.
Creative Variations and Customizations to Enhance Your Setup

To truly customize your magnetic spice rack, consider experimenting with different jar shapes, colors, and labeling styles to match your kitchen decor and personal preferences. This adds visual interest and makes locating spices easier. You can try:
- Mixing round, hexagonal, or square jars for unique patterns.
- Using colorful lids or jars to create vibrant, themed displays.
- Applying labels with chalkboard paint, clear stickers, or branded label makers for easy identification.
These customizations not only enhance aesthetics but also improve functionality. For example, color coding can streamline your cooking process, while decorative jars add personality. Feel free to combine different styles and materials to craft a setup that’s truly yours—functional, stylish, and uniquely tailored to your space.
Frequently Asked Questions
How Do I Ensure My Spice Jars Stay Securely Attached During Use?
To keep your spice jars securely attached, make certain to use strong magnets like neodymium with a pull strength of 3-5 kg. Attach multiple magnets—two or three per jar—for added stability, especially on vertical surfaces. Test the magnet strength before mounting, and ensure the lids are tightly sealed. Regularly check the magnets and jars for wear or loosening, replacing magnets if needed to maintain a strong hold during use.
Can I Customize the Size of the Magnetic Plate for Different Kitchen Spaces?
Do you want your spice rack to fit perfectly in your kitchen? You can definitely customize the size of the magnetic plate to suit your space. Measure your available wall or cabinet area carefully, then cut or choose a plate that matches those dimensions. Using scrap metal or repurposed materials can also help you create a custom-sized base. Flexibility in size guarantees your spices are organized without cluttering your kitchen.
What Safety Precautions Should I Take When Working With Neodymium Magnets?
When working with neodymium magnets, you should handle them carefully to prevent injury. Keep them away from your fingers to avoid pinching, and avoid placing them near electronic devices or credit cards, as they can damage or erase data. Wear gloves if possible for extra protection, and store magnets out of children’s reach. Be cautious of their strong pull, which can cause the magnets to snap together suddenly and break.
How Do I Prevent Rust or Corrosion on the Metal Components Over Time?
To prevent rust or corrosion on your metal components, you should keep them dry, clean, and well-maintained. Apply a clear protective coat or rust-resistant paint, regularly wipe away moisture, and store jars in a dry environment. Use stainless steel for durability, check for signs of rust periodically, and replace any rusted parts promptly. Proper maintenance guarantees your magnetic spice rack stays functional, attractive, and long-lasting.
Are There Eco-Friendly Alternatives to Buying New Magnetic Jars and Plates?
You can use recycled or repurposed materials for your magnetic jars and plates. For example, repurpose old metal lids, cookie sheets, or scrap metal as bases, and attach magnets to existing containers or small tins. Buying empty jars in bulk and using refillable, eco-friendly options reduces waste. This approach not only saves money but also helps the environment, making your spice rack both functional and sustainable.
Conclusion
Sure, your magnetic spice rack is now the envy of every kitchen—until that inevitable day when a jar slips and crashes. All that effort, perfectly organized, rendered chaotic in seconds. But hey, at least you’ll have a great story to tell about your “creative” storage solution gone awry. Sometimes, the best lessons come from a spilled spice or two. Embrace the chaos – it’s all part of the DIY adventure.